Tips to Store Your Holiday Decorations


|
 Taking down your holiday decorations can seem like a daunting task and really feel like an end to holiday celebrations, but these easy steps will help make storing a breeze and set you up for success the following year. First, take a picture of every room so next year you’ll remember where each décor piece went. This will save you so much time and stress trying to remember your previous perfect set-up. Next, while you are packing up the decorations, take this time to declutter. Donate any unused or longer needed items and upcycle or throw out any broken pieces. This is also a great time to go through holiday cards as over the years they can take up a lot of space in your storage. Keep any cards that have a personal message, family photos, or sentimental value, then recycle or upcycle the remaining cards. Check out these fun holiday crafts using old cards. Following these steps will save you storage space and time and set you up for a great start to your packing.
|

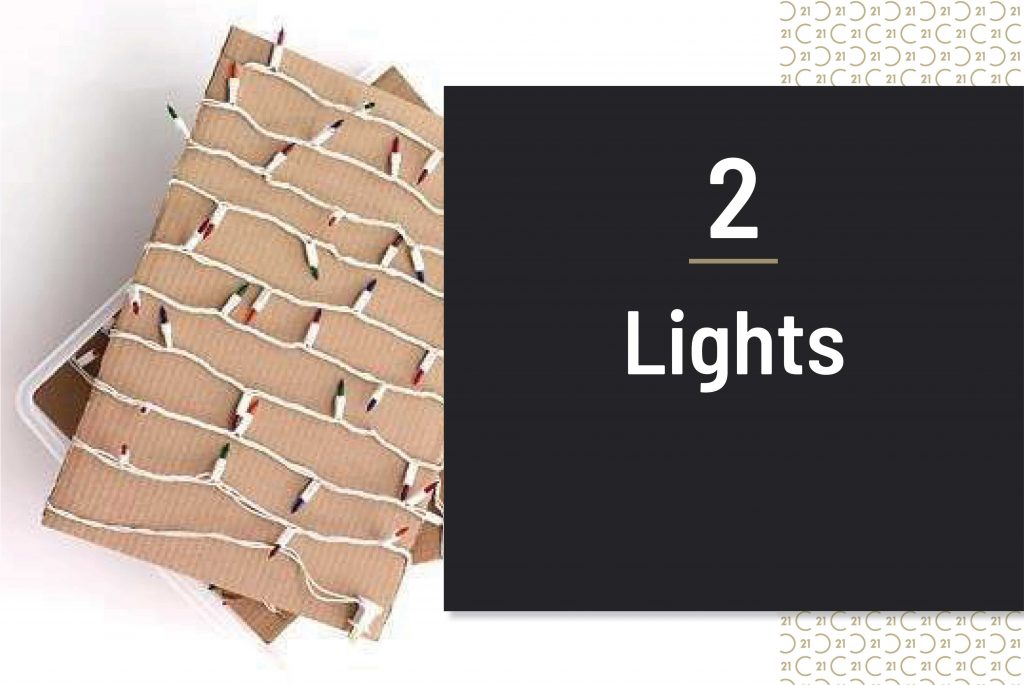
Outdoor lights are usually one of the first holiday decorations that are taken down (usually so you don’t get judged by your neighbours if they are up too long). They can also be the most time consuming to put back up the following year because they get tangled in storage. There are many specialized storage bags and reels that will help preserve the lights; however, we have some cost-free solutions using materials you already have at home. If you have extra cardboard lying around, cut the box into rectangle pieces. On one end of the cardboard cut a small slit then slip one end of the light string in and begin wrapping the string around the board until you reach the end. Cut another small slit to hold the other end of the string. This storage hack will keep the lights detangled all year, saving you time, money, and storage space because you can stack or layer each light board.

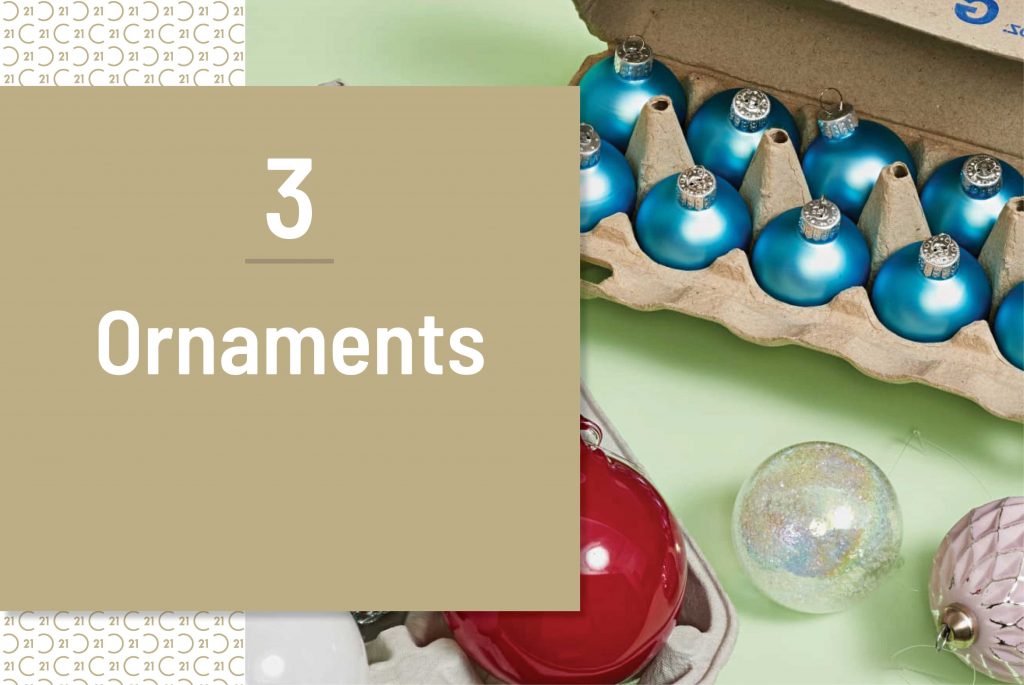
Ornaments are some of the most fragile holiday decorations and often get broken while in storage. There are many costly storage solutions out there, but here are some DIY projects that will help keep your ornaments safe year after year. For smaller ornaments, use egg cartons. This is a great solution as each box can hold a dozen pieces and can be easily stacked to make storing easy. For larger ornaments, to-go coffee holders are a great option. Although they typically can only hold 4 ornaments, they are also great for stacking and can help keep your pieces safe and organized. Another DIY storage solution is to glue red solo cups to a piece of cardboard (ensure the piece fits inside your storage containers), then simply place ornaments in the cups. This is a great option if you have many different size bulbs as you can fit multiple into each cup, and just like the previous storage solutions, each cardboard piece is stackable to keep them secure in storage.

Artificial trees have many benefits over real trees; however, storing them can be very daunting. Because of their large size and weight, it can be hard to find a spot to keep them. Plus, it can take a lot of time and energy to set up the tree each year. A storage solution that will save you time and space, is to shrink wrap your tree. Starting from the top, section off branches and begin to shrink wrap them up. You’ll want to do 4-5 layers, so it is secure, then work your way down the tree in small parts. This will save you so much storage space. Plus, you can keep the lights on the tree, so next year all you have to do is cut off the plastic wrap and fluff up the branches. If mummifying your tree doesn’t work for your storage, you can also use an old or thrifted hockey bag. These are great storage solutions as they can hold so much (more than enough room for all your tree accessories) and many come with wheels making it easy to place and remove from storage.

Here are a few other tips for storing those miscellaneous holiday decorations that will help save you money, time, and space. First, to help keep beads from tangling with other décor pieces put them into an empty plastic water bottle. This will save you so much time detangling and each bottle can hold two strings. Second, hang your wreaths in a dry-cleaning bag to keep the wreath dust-free all year and make storing easy by hanging them in any closet or on any hook. Next, use paper towel or toilet paper tubes to store cords. This will keep all the cords organized and prevent them from tangling, helping them last longer. Finally, include a detailed list of what is in each box and place it in a sheet protector visible on the box, this will save you time and make finding and storing a breeze.
Big Style Kitchens

|
How to really live in your Living Room

Ironically the living room is the space that is lived in the least! Many people prefer to spend time in the family room or kitchen; however, it can be a huge waste of good real estate to ignore the living room. Saving the living room for a special family occasion or the holidays is a shame; it’s a room that should be used and enjoyed every day.

Treat the design and décor of your living room as beautiful, useable, and easy – not ‘special’. Think about how you live and what you want the living room to do for your lifestyle. Try using the living room as a multi-functional space for working, playing, and entertaining. Design your living room to be versatile, stylish, and easy to live in so that they can fulfil many roles. Use sturdy but lush fabrics like velvet and linen blends with fun patterns. Look for strong durable surfaces like stone and hardwoods, a variety of floor covering like sisal mixed with hides, Persian Rugs and accents that are amusing, personal and lend humour to the atmosphere.

Lighting is an important factor as well. To create a functional and well-lit space, use a mixture of overhead lighting, table lamps, floor lamps, up lights, reading lights, picture lights and candles.

Try to have enough seating for at least 10 people. Use a mix of sofas, easily moveable side chairs and stools for perching, plus lots of empty floor space for pillows. Tables showcase trays filled with objects that have special meaning but there’s always room for a cocktail or bowl of sweet or savoury treats. You can also incorporate a desk into your living room, which doubles as another server if a party breaks out.

Live in your living room – and don’t just save it for a special occasion or holiday. Use it to its full potential and create a beautiful and comfortable space where you can eat, drink and be merry – everyday!
Fall Maintenance Tips

|
|
Summer Cleaning Tips!

|
|
Backyard Trends

|
|
|
|
|
|
|
|
|
Create and Maintain a Functional, Organized Closet

If your closet is overflowing with clothing and accessories, then it’s time to arrange your space so that it is functional and organized. Whether your closet is small or a spacious walk-in, this organizational guide will help you create and maintain a coordinated closet that will save you time and help eliminate stress.

The first step to getting an organized closet is to get rid of unused items. Take the time to sort through all your clothing, bags, jewelry, and other accessories and donate the items you no longer use. Depending on your closet size this may seem like an unbearable task, but if you declutter by section, it will help break up the job, making it effortless. Next, temporally remove all the items from your closet, then clean the entire closet. Starting with a blank canvas will help you better visualize your space and make organizing a breeze.

Now that your closet is decluttered and clean it’s time to start organizing! Sort all your closet pieces into categories (shirts, pants, sweaters, etc.) so that you can measure how much space each category will take. Then come up with a plan of where each category will live in your space, keep in mind the size, preferred storage method, and frequency of use when planning. Remember, successful closet organization depends on your personal style, so there is no right or wrong way to arrange.
Once your plan is set, start hanging up your pieces. To help save time on your busy mornings, colour-code your wardrobe so you can quickly scan through your items. If you are tight on space, be sure to choose space-saving hangers and try double hanging less-used items. Don’t know if a piece should be hung or folded? Here’s the best way to store all your clothes.
 After you have organized and sorted all your clothing, make sure that the closet is functional. Use dividers to separate clothing categories and to help keep your folded clothing upright. Repurpose magazine holders to store purses and clutches. And add baskets to store loose or eyesore items.
You can even make your closet even more functional with task lighting. These lights will improve the visibility of your items, plus it elevates your closet with an elegant look.

One of the biggest problems when it comes to organizing a closet is a limited amount of space. Maximize your area by:
- Placing a dresser below your hanging items. The once wasted space now brings additional storage for folded clothing or items you want out of sight.
- Use the back of the closet door for a shoe rack.
- Don’t forget about your vertical space! Walls are often passed over but can make for great storage spaces. Add hooks to hang jackets, scarfs, hats, and more. Display wall mounts are perfect for hanging jewelry and accessories like sunglasses.
If you are still limited on space, place a clothing rack in your room to display favourite pieces, frequently used items, or upcoming outfits. Finally, don’t forget to use additional storage spaces in your home for out-of-season items.

Now that you created an organized and functional closet, you must maintain the order. Set aside 5 minutes each day to do a quick clean of the space to preserve its form. Additionally, try reorganizing seasonally, this includes swapping out seasonal clothing and removing any unused items. To help make this quarterly process smooth, add a donation bin to your closet so when you find something that doesn’t fit, or you don’t like anymore, you can place it in the bin to readily remove when it comes time to declutter.
Finally, consider turning your hangers backwards to mark frequently worn clothing. This will help you see which clothes you rarely wear so you can donate.
How to create a Hobby-Space in your Home

Hobbies are a great way to relax, hone your skills, and unwind after a long day. Having a dedicated space in your home for your hobby can keep supplies organized and give you a place to enjoy your favourite pastime. Whether it’s a whole room or just a corner, here’s how you can carve out some space for your hobbies.

Do you use each room in your home every day? Take a moment to consider whether a storage room can be cleared out if it’s full of junk, or if a corner is being occupied by a side table that could be a small desk instead. Maybe consider changing up one of the larger rooms if it’s not used often – do you often use your dining room, or eat in the kitchen?

If you have a lot of tools and not a lot of space to store them, consider using a pegboard to keep them up and on the walls. You’ll be able to see where everything is, and if you have smaller odds and ends, mason jars will allow you to keep them together and even show them off as unique decorations.

Artists of all kinds can find themselves collecting supplies that end up all over the place, so keep things together using a wheeled storage cart. These are great if you don’t have a big desk and want to maximize the surface area to create your work. Storage carts can sit next to your work area and hold your supplies at the ready.

If you’re a reader, a crafter, a gamer, or any kind of hobbyist that sits down a lot, make sure you’re comfortable! Look for a cushion that offers good back support, or a throw blanket to curl up under. Ask yourself if your hobby would be easier if your chair has arms, or better off without.

Show off your skills! Make a piece of art or create a sign for your hobby space to show off your passion. If you’re not crafty, consider a related piece of artwork or a print, or maybe an old tool you have lying around that can be displayed. These can serve as little pieces of inspiration when you want to settle into your space and unwind.
Increase Your Home’s Curb Appeal


First impressions are everything and can make or break any opportunity, so what impression is the exterior of your home giving? Whether you are putting your house on the market or just want to give your home a nice and finished look, these simple upgrades will boost your home’s curb appeal and make an exceptional first impression.
 There is no quicker way to upgrade your curb appeal than with a lush, vibrant garden and plants. Here are some of the many ways you can add eye-catching greenery to your front yard.
First, include potted plants on the front porch to bring colour to your home. Create your own arrangements with your favourite plants or flowers, or if you don’t have a green thumb opt for ready-made containers from your local garden center.
Second, installing window boxes is another great way to boost your home’s curb appeal. Mix and match flowers and plants to pair with your colour scheme and try this DIY window box for a fun weekend project.
Finally, adding a garden bed in the front of your home is a sure way to make a great first impression. Trees, shrubs, flowers, and more can be combined to add vibrance and dimension to your front yard. When creating your garden bed, be sure to choose plants that will frame your home rather than obscure it. Any greenery will increase your home’s welcoming feel, but you must be sure to keep up its maintenance. To keep your garden in tip-top shape, water regularly, prune overgrowth, remove weeds, and trim the lawn.
Small upgrades to your front porch can instantly improve your curb appeal and create a warm, welcoming home. Paint your front door to add contrast and brightness. A fresh coat of paint or a brand-new bold colour will help

revive the look of your front porch and attract loads of attention. Bright, loud coloured doors have been a popular trend, but you can never go wrong with a classic red door.
Next upgrade your hardware. Your door handles, house number, mailbox, and lanterns probably haven’t seen an update since before you moved in. Now is the time to replace these for a matching, modern look.
To finish off your front porch look, add a seasonal wreath and lighthearted welcome mat. This simple touch makes your home approachable and keeps the season’s dirt outside. When making your porch upgrades keep symmetry in mind as a balanced appearance will attract more viewers with its calm, reliable feel.
 Improving your home’s curb appeal does not require a full exterior renovation. Simple outdoor maintenance tips can do wonders in making your home look brand-new. Start at the top of your home – the roof. Rather than replacing your roof, give it a good clean. Removing dirt, stains, and discolouration will make your roof look pristine and help it last longer. While you are up cleaning your roof, take the time to thoroughly wash your gutters. Remove any clogged debris and built-up dirt to impress neighbours and guests.
Cleaning your windows is another simple way to boost your home’s curb appeal. Dirty windows can be a serious eyesore, plus they hinder beautiful views. A quick, consistent wipe-down (especially after the winter season) will help keep your exterior tidy. To really make your windows pop, try adding window shutters. Depending on the style of your home, natural wood or energetic coloured shutters bring dimension and contrast to your home’s exterior. These DIY cedar shutters are a quick and cost-effect project to up your home’s look.
An additional home maintenance tip to boost your curb appeal is painting your exterior. A fresh coat of paint or a new modern colour will immediately upgrade your home’s appearance, making it feel brand-new. Although this may be no simple or cheap task, it shows you take care of your property and gives off a memorable first impression.

Your driveway sees a lot of wear and tear over the years and growing damage can be deteriorating your home’s curb appeal. A full redo is not necessary to upgrade your home’s appearance, some minor repairs will get your driveway looking as good as new.
First wash the whole driveway to remove any stains, debris, or unwanted weed growth. If you have access to a power washer this will save you time and scrubbing effort. Then repair and fill in cracks with the proper solution for your surface. These small fixes will make a drastic improvement to your home’s curb appeal and give neighbours, visitors, and people passing by an exceptional first impression.
Spring Home Maintenance Tips

Here are some March Maintenance Tips for your home. 
- Clean or replace furnace filter
- Check air ducts, remove covers and vacuum dust from vents;
- Check and clean the heat recovery ventilator (HRV); wash or replace the filter;
- Check attic, basement and crawl spaces for leaks or moisture
- Check sump pump (if installed) for discharge
- Clean humidifier and check for condensation and proper humidity levels
- Remove snow and ice from overhang and vents
- Check and reset ground fault circuit interrupter (GFCI)
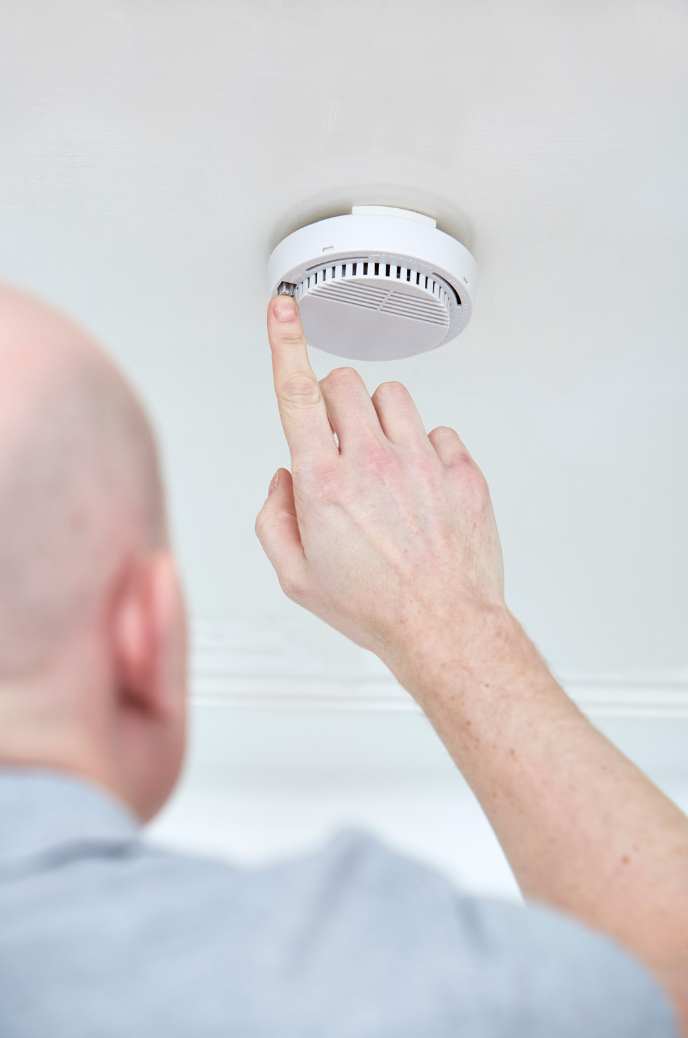
- Test smoke alarms and carbon monoxide detectors

 Facebook
 X
X
 Pinterest
 Copy Link


 Book an appointment with a qualified company – annually for an oil furnace and every two years for gas.


 With
With 


